The Honeywell T6 Pro Programmable Thermostat is a smart‚ Wi-Fi-enabled device designed for efficient temperature control and seamless smart home integration. It offers adaptive learning‚ geofencing‚ and remote management through the Honeywell Home app‚ ensuring optimal comfort and energy savings. With a sleek design and optional cover plate‚ it’s compatible with various HVAC systems‚ making it a versatile solution for modern homes.
1.1 Overview of the T6 Pro Thermostat
The Honeywell T6 Pro Programmable Thermostat is a cutting-edge‚ Wi-Fi-enabled device designed for efficient temperature control and smart home integration. It features programmable settings‚ geofencing‚ and adaptive intelligent recovery‚ which learns your system’s needs to optimize heating and cooling. Compatible with various HVAC systems‚ it ensures seamless operation and energy efficiency. The thermostat includes a sleek design‚ optional decorative cover plate‚ and the innovative UWP mounting system for easy installation. With remote management via the Honeywell Home app‚ it offers unparalleled convenience and customization‚ making it a versatile solution for modern households seeking comfort and energy savings.
1.2 Key Features of the T6 Thermostat
The Honeywell T6 Thermostat features adaptive intelligent recovery‚ learning your system’s heating and cooling patterns to pre-empt temperature adjustments. It supports geofencing‚ adjusting settings based on your location‚ and integrates seamlessly with smart home systems via the Honeywell Home app. The thermostat includes a programmable schedule‚ voice control compatibility‚ and an optional decorative cover plate for aesthetic customization. Its UWP mounting system ensures easy installation‚ while the energy-efficient design helps reduce utility bills. Additional features like smart recovery mode and remote management enhance user convenience‚ making the T6 a comprehensive solution for modern home comfort and energy management.

System Requirements and Compatibility
The Honeywell T6 Thermostat is compatible with most HVAC systems‚ including forced air and hydronics; It requires a C-wire or AA batteries for power and supports smart home systems like Amazon Alexa and Google Home through the Honeywell Home app. The thermostat is designed to work with the UWP mounting system‚ ensuring easy installation across various configurations. Compatibility extends to 3-heat‚ 2-cool setups‚ making it versatile for different home environments.
The Honeywell T6 Pro Thermostat is compatible with a wide range of HVAC systems‚ including conventional forced air systems‚ heat pumps‚ and hydronic heating systems; It supports multi-stage heating and cooling setups‚ up to 3 stages of heat and 2 stages of cool‚ ensuring precise temperature control. The thermostat is also compatible with dual fuel systems‚ where it can switch between gas and electric heating sources. Additionally‚ it works seamlessly with floor temperature sensors‚ making it suitable for radiant floor heating applications. This versatility ensures the T6 Pro can adapt to various home heating and cooling needs efficiently. The Honeywell T6 Pro Thermostat seamlessly integrates with smart home systems‚ offering enhanced convenience and control. It is compatible with popular platforms like Amazon Alexa and Google Assistant‚ enabling voice command functionality. The thermostat can also be managed remotely through the Honeywell Home app‚ allowing users to adjust settings‚ monitor energy usage‚ and receive notifications. Geofencing technology learns your schedule and location to optimize heating and cooling‚ ensuring energy efficiency. This smart integration allows for effortless temperature control‚ whether you’re at home or away‚ making it a perfect addition to any smart home ecosystem. The Honeywell T6 Pro Thermostat package includes the thermostat unit‚ UWP mounting system‚ decorative cover plate‚ installation adapter‚ screws‚ anchors‚ and 2 AA batteries for easy setup. The Honeywell T6 Pro Thermostat package contains essential components for installation and operation. These include the T6 Pro Thermostat unit‚ designed for smart temperature control‚ and the UWP Mounting System‚ which simplifies wall installation. Additionally‚ a decorative cover plate is provided to enhance aesthetics and cover any wall imperfections. The package also includes a Honeywell Standard Installation Adapter‚ compatible with most junction boxes‚ along with screws and anchors for secure mounting. Two AA batteries are provided for initial setup‚ ensuring the thermostat is ready for immediate use. This comprehensive set ensures a hassle-free installation process. To enhance functionality and customization‚ several optional accessories are available for the Honeywell T6 Pro Thermostat. These include additional decorative cover plates in various sizes to match different home décors and a floor temperature sensor for hydronic systems‚ ensuring precise temperature control. Additionally‚ a safety limit thermostat can be integrated to monitor and regulate extreme temperatures‚ providing an extra layer of protection. These accessories allow users to tailor their system to specific needs‚ improving performance and convenience. They are available separately and can be easily integrated during or after installation. The Honeywell T6 Pro Thermostat features the UWP Mounting System‚ designed for secure and straightforward installation. An optional decorative cover plate is also available to enhance aesthetics. The UWP Mounting System provides a secure and efficient way to install the Honeywell T6 Pro Thermostat. Begin by pushing excess wires into the wall opening and closing the UWP door. Align the thermostat with the mounting system and gently snap it into place until it clicks. Ensure the door remains closed without bulging. This system allows for a flush mount‚ creating a sleek appearance. It is designed to fit standard electrical junction boxes‚ making installation straightforward for both new and retrofit applications. Follow the provided instructions carefully to ensure proper installation and functionality. The optional cover plate is designed to enhance the thermostat’s appearance and cover any paint gaps left by previous installations. It is ideal for mounting the thermostat directly to an electrical junction box or when additional aesthetic coverage is needed. The cover plate is small in size (4-49/64 in x 4-49/64 in x 11/32 in) and fits seamlessly with the UWP mounting system. Simply snap the cover plate onto the thermostat after installation to achieve a clean and professional look. This accessory ensures a smooth transition during retrofit installations while maintaining the sleek design of the Honeywell T6 Pro Thermostat. The Honeywell T6 Pro Thermostat features a UWP mounting system and clear wiring terminal designations for easy installation. It supports conventional HVAC systems‚ including forced air and hydronics‚ ensuring compatibility with various setups. The thermostat also includes a safety limit thermostat for manual reset‚ providing an additional layer of protection during operation. Proper wiring connections are essential for optimal performance and energy efficiency. The Honeywell T6 Pro Thermostat features clearly labeled wiring terminals to ensure a straightforward installation process. The terminals are designated as follows: R (24V AC power)‚ W (heating stage)‚ Y (cooling stage)‚ and C (common). These designations align with standard HVAC wiring practices. The thermostat also supports advanced configurations‚ such as heat pumps and dual-fuel systems‚ by utilizing additional terminals like O/B and AUX. Proper wiring connections are critical for safe and efficient operation. Always refer to the installation manual or consult a professional to ensure correct terminal assignments and system compatibility. This ensures optimal performance and prevents potential damage to the HVAC system. The Honeywell T6 Pro Thermostat supports conventional HVAC systems‚ including forced air and hydronic configurations. For standard installations‚ connect the R (24V AC power) wire to the thermostat’s R terminal. The W wire is connected for heating‚ and the Y wire for cooling. Ensure the C (common) wire is properly connected to maintain continuous power. For hydronic systems‚ additional wires may be required for pump controls. Always turn off power at the breaker before wiring. Follow the manual’s diagrams to match your system type. If unsure‚ consult a licensed professional to avoid errors. Proper wiring ensures reliable operation. The Honeywell T6 Thermostat offers advanced features like Adaptive Intelligent Recovery‚ geofencing‚ and smart home integration. It learns your system’s needs to optimize heating and cooling efficiency. The Honeywell T6 Thermostat features Adaptive Intelligent Recovery‚ a technology that learns how long your HVAC system takes to reach the desired temperature. By analyzing your system’s performance‚ it pre-activates heating or cooling to ensure comfort at your scheduled times. This smart feature optimizes energy use and maintains consistent temperatures‚ adapting to your home’s unique needs over time. It ensures that your space is always comfortable when you need it‚ without unnecessary energy consumption. This intelligent recovery system is a key part of the T6’s energy-saving capabilities and enhances overall user experience. The Honeywell T6 Thermostat supports geofencing‚ using your smartphone’s location to automatically adjust temperature settings when you leave or arrive home. This feature helps optimize energy usage and ensures comfort. It also integrates seamlessly with popular smart home systems like Amazon Alexa and Google Home‚ allowing voice control and centralized management. Through the Honeywell Home app‚ users can remotely adjust settings‚ receive system alerts‚ and monitor energy consumption. This integration enhances convenience and efficiency‚ making the T6 a versatile solution for modern smart homes. Its compatibility with various platforms ensures a streamlined and connected experience. The Honeywell T6 Thermostat installation involves turning off power‚ removing the old thermostat‚ mounting the UWP system‚ connecting wires‚ snapping the thermostat into place‚ and powering on. Before installing the Honeywell T6 Pro Thermostat‚ ensure the power to the HVAC system is turned off at the breaker. Verify compatibility with your existing HVAC system and gather all tools and materials‚ including the UWP mounting system‚ screws‚ and batteries. Check the wiring configuration and ensure the thermostat location is at least 1.2 meters above the floor‚ away from direct sunlight and heat sources. Review the installation manual to confirm all steps are understood and prepare the wall for mounting by removing any old thermostat and excess wiring. Proper preparation ensures a smooth and safe installation process. To mount the Honeywell T6 Pro Thermostat‚ begin by removing any excess wire from the wall opening and closing the UWP (Universal Wall Plate) door‚ ensuring it lies flat without bulging. Align the UWP with the thermostat and gently push until it snaps securely into place. If using the optional cover plate‚ attach it to conceal any paint gaps or for aesthetic purposes. Once mounted‚ turn the power back on at the breaker or switch to test the thermostat’s functionality. Ensure the thermostat is level and properly seated to guarantee accurate temperature sensing and reliable operation. When connecting wires to the Honeywell T6 Pro Thermostat‚ ensure the power is off at the breaker. Match each wire to the appropriate terminal on the thermostat based on the wiring diagram provided in the manual. Securely fasten the wires to prevent loose connections. For conventional systems‚ connect the R‚ W‚ Y‚ G‚ C‚ and any auxiliary wires as required. Use wire nuts or push connectors for a reliable connection. After wiring‚ turn the power back on and test the system to ensure proper functionality. Always refer to the wiring terminal designations in the manual for accurate installation. Configure the thermostat for heat‚ cool‚ or auto modes to suit your preference. Adjust temperature settings and schedule programs for optimal comfort and energy efficiency. The T6 thermostat allows precise configuration for heating and cooling systems. Set the desired temperature range for both modes to ensure comfort. Use the Honeywell Home app to adjust settings remotely. Program schedules to optimize energy use‚ and enable adaptive recovery for efficient system operation. Configure the changeover valve for heat or cool modes based on your HVAC setup. Ensure compatibility with heat pumps or conventional systems for seamless functionality. Adjust these settings in the installer setup menu to customize performance according to your home’s needs. Proper configuration ensures efficient heating and cooling operation throughout the year. The changeover valve configuration determines whether the system operates in heating or cooling mode. Set the valve type (e.g.‚ O for cooling or B for heating) in the Installer Setup (ISU) menu. Proper configuration ensures the HVAC system switches correctly between modes. For heat pumps‚ configure the changeover valve to match the system’s operation. Incorrect settings may cause improper system operation. Refer to the ISU parameters for detailed options. Ensure compatibility with your HVAC system type‚ such as heat pumps or conventional systems. Accurate setup guarantees efficient heating and cooling performance. Always verify the configuration matches your system requirements for optimal functionality. This step verifies proper installation and functionality. Ensure the thermostat and HVAC system operate correctly‚ checking heating‚ cooling‚ and system transitions. Perform full-cycle tests to confirm reliability. After installing the Honeywell T6 Pro Thermostat‚ test the HVAC system to ensure proper operation. Verify heating and cooling modes by setting the thermostat to test temperatures. Check for smooth transitions between modes and confirm the system responds to temperature changes. Ensure the system reaches the setpoint accurately and that all safety features‚ like the safety limit thermostat‚ function correctly. Additionally‚ verify that the system cycles on and off as expected and that there are no unusual noises or malfunctions. This step ensures the HVAC system operates efficiently and safely with the new thermostat. Once the HVAC system is tested‚ verify the Honeywell T6 Pro Thermostat’s operation by checking its display accuracy‚ responsiveness‚ and feature functionality. Ensure the thermostat powers on and the screen is clear. Test the temperature setpoints by adjusting them and confirming the HVAC system responds accordingly. Verify the adaptive intelligent recovery feature by observing if the system activates heating or cooling earlier to reach the desired temperature on time. Also‚ check the geofencing feature if connected to the Honeywell Home app‚ ensuring it adjusts settings based on your location. Finally‚ confirm that the thermostat maintains the set temperature consistently and efficiently. The Honeywell T6 Pro offers advanced features like Smart Recovery Mode and geofencing‚ enhancing energy efficiency and convenience through intelligent temperature management and location-based adjustments. The Honeywell T6 Pro Thermostat features Smart Recovery Mode‚ which learns the time required for your HVAC system to reach the desired temperature. It activates heating or cooling early to ensure comfort at the set time. This innovative feature optimizes energy use and eliminates temperature swings‚ providing a consistent and cozy environment. By adapting to your system’s performance‚ Smart Recovery Mode enhances efficiency and ensures your home is always comfortable when you need it to be. This intelligent functionality is a key highlight of the T6 Pro’s advanced capabilities. The Honeywell Home app enables remote management of the T6 Pro Thermostat‚ allowing users to adjust settings‚ schedule temperatures‚ and monitor energy usage from anywhere. Compatible with iOS and Android‚ the app provides real-time notifications and seamless control‚ ensuring optimal comfort and efficiency. Geofencing integration automatically adjusts temperatures based on your location‚ while energy reports help track consumption. This feature enhances convenience and energy savings‚ making it ideal for smart home enthusiasts. With the Honeywell Home app‚ managing your T6 Pro Thermostat is effortless‚ whether you’re at home or on the go. Common issues include connectivity problems‚ display malfunctions‚ or temperature inaccuracies. Ensure proper wiring‚ check Wi-Fi connectivity‚ and verify battery levels. Resetting the thermostat often resolves issues. Common installation issues with the Honeywell T6 thermostat often involve wiring mistakes‚ such as incorrect terminal connections or loose wires; Ensure all wires are securely attached to the correct terminals. Another frequent problem is improper mounting‚ which can cause the thermostat to malfunction. Verify that the UWP mounting system is installed correctly and level. Additionally‚ connectivity issues may arise if the thermostat is not properly paired with the Honeywell Home app or if the Wi-Fi signal is weak. Always refer to the installation manual for specific troubleshooting steps. Resetting the Honeywell T6 thermostat can resolve various issues. For a hard reset‚ remove the batteries for 10 seconds to clear temporary settings. For a factory reset‚ navigate to the installer settings‚ select “Reset to Default‚” and confirm. Note that this will erase all custom configurations‚ including schedules and preferences. Use this option sparingly to avoid losing personalized settings. Always refer to the manual for detailed reset procedures. This ensures the thermostat operates correctly after any software or connectivity issues. Resetting is a useful troubleshooting step before considering more complex solutions. Regularly clean the Honeywell T6 thermostat with a soft cloth to prevent dust buildup. Replace batteries annually or when low battery is indicated. Avoid exposure to direct sunlight or heat sources to ensure accurate temperature readings. Regular cleaning is essential for maintaining the Honeywell T6 thermostat’s performance. Use a soft‚ dry cloth to gently wipe the screen and exterior‚ removing dust and dirt. Avoid harsh chemicals or liquids‚ as they may damage the device. For stubborn marks‚ lightly dampen the cloth with water‚ but ensure it is thoroughly dry before wiping the thermostat. Turn off the power at the breaker before cleaning to prevent any accidental activation. Cleaning ensures accurate temperature readings and smooth touchscreen functionality. Perform this maintenance every 2-3 months or as needed to keep the thermostat functioning optimally. To replace the batteries in your Honeywell T6 thermostat‚ start by turning off the power at the circuit breaker. Remove the thermostat from the UWP mounting system to access the battery compartment‚ located on the back or bottom of the device. Insert two fresh AA batteries‚ ensuring the polarity matches the diagram provided. Avoid mixing old and new batteries for optimal performance. After replacing‚ reattach the thermostat to the mounting system and restore power. If using the optional cover plate‚ ensure it is securely snapped back into place. Proper battery maintenance ensures consistent functionality and accurate temperature control. Optimize temperature settings by adjusting based on occupancy and seasonal changes. Use programmable schedules to reduce energy use when heating or cooling is unnecessary. Regularly update settings via the Honeywell Home app to maintain efficiency and comfort. Optimizing temperature settings with the Honeywell T6 thermostat enhances energy efficiency and comfort. Lower the temperature when the house is unoccupied or during sleep hours to reduce heating costs. In summer‚ raise the temperature when away to minimize cooling usage. Use the Honeywell Home app to adjust settings remotely and create schedules tailored to your lifestyle. The T6’s adaptive recovery feature learns your system’s needs‚ ensuring the desired temperature is reached efficiently. Small adjustments can lead to significant energy savings without compromising comfort. Regularly review and update settings to maintain optimal performance and energy efficiency. Programmable schedules with the Honeywell T6 thermostat allow precise temperature control‚ aligning with your daily routine. Set up to four periods per day‚ adjusting temperatures for wake‚ leave‚ return‚ and sleep. Use the Honeywell Home app to create and modify schedules remotely‚ ensuring consistent comfort and energy efficiency. For example‚ lower temperatures when you’re away or asleep and raise them when you return. The T6’s geofencing feature can also adjust settings based on your location‚ further optimizing energy use. By customizing schedules‚ you can balance comfort and energy savings seamlessly‚ making the T6 a practical choice for modern households. The Honeywell T6 thermostat seamlessly integrates with popular smart home systems like Amazon Alexa and Google Home‚ enabling voice control and geofencing through the Honeywell Home app for enhanced convenience and remote management. To connect the Honeywell T6 thermostat to your smart home system‚ download the Honeywell Home app from the App Store or Google Play. Ensure your thermostat and smart devices are on the same Wi-Fi network. Open the app‚ select “Add Device‚” and follow the in-app instructions to link your thermostat. For voice control‚ enable the Honeywell Home skill in Amazon Alexa or Google Home. This integration allows you to adjust temperatures‚ set schedules‚ and receive system alerts remotely‚ enhancing your home’s automation and energy efficiency. The Honeywell T6 thermostat supports voice control through Amazon Alexa and Google Home. To enable this feature‚ open the Honeywell Home app‚ navigate to settings‚ and link your thermostat to your smart speaker. For Alexa‚ enable the Honeywell Home skill in the Alexa app and link your account. For Google Home‚ link your Honeywell Home account through the Google Home app. Once connected‚ you can adjust temperatures‚ set schedules‚ and receive system updates using voice commands. For example‚ say‚ “Alexa‚ set the living room to 72 degrees‚” or “Hey Google‚ turn up the heat.” This feature enhances convenience and efficiency‚ allowing seamless control without manual adjustments. The Honeywell T6 thermostat installation is now complete. Ensure all final checks and verifications are done. This concludes the setup process‚ ensuring optimal energy efficiency‚ comfort‚ and system performance. After completing the installation‚ perform a thorough system check. Ensure the thermostat is correctly mounted and all wires are securely connected. Test the HVAC system by running a heat and cool cycle to verify proper operation. Check the Honeywell Home app for remote functionality and geofencing features. Confirm that the thermostat learns your schedule and temperature preferences accurately. Finally‚ review all settings to ensure they align with your comfort and energy-saving goals. This final verification step guarantees your Honeywell T6 thermostat operates efficiently and effectively. To ensure the Honeywell T6 thermostat operates correctly‚ perform regular checks and maintenance. Verify that all wiring connections are secure and free from damage. Check the battery levels and replace them as needed to prevent system interruptions. Clean the thermostat’s surface and sensors to maintain accuracy. Schedule periodic software updates through the Honeywell Home app to access the latest features and improvements. Additionally‚ review your programmed settings and adaptive learning patterns to ensure they align with your comfort preferences. Regularly inspect the HVAC system for optimal performance. These steps ensure your T6 thermostat continues to function efficiently and effectively over time.2.1 HVAC System Compatibility
2.2 Smart Home Integration
Package Contents
3.1 Items Included in the Package
3.2 Optional Accessories
Mounting Systems
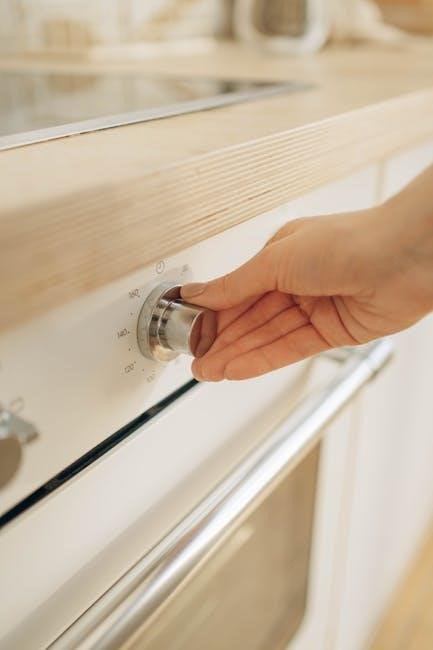
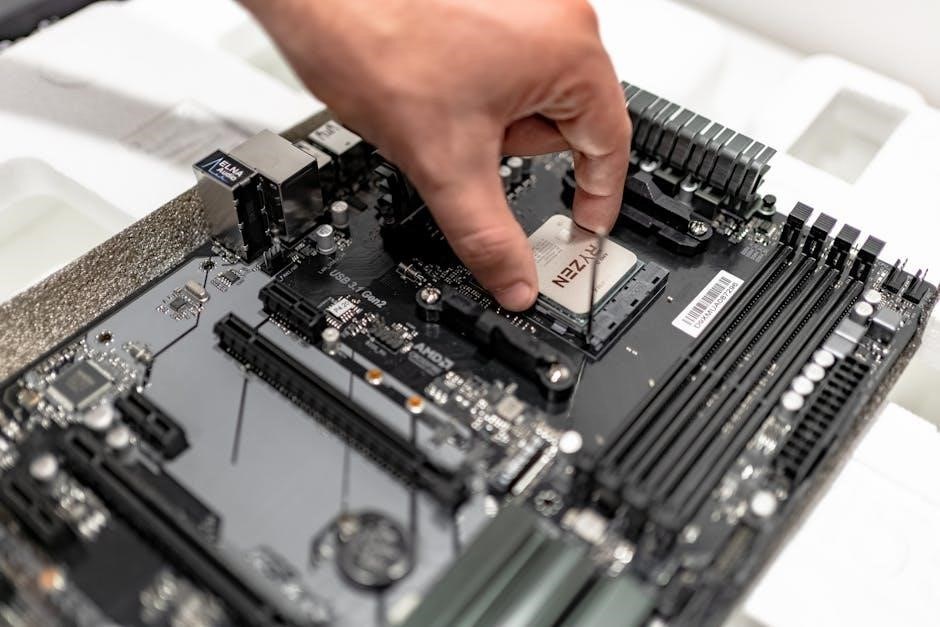
4.1 UWP Mounting System Installation
4.2 Using the Optional Cover Plate

Wiring and Connections
5.1 Wiring Terminal Designations
5.2 Conventional System Wiring

Thermostat Features
6.1 Adaptive Intelligent Recovery
6.2 Geofencing and Smart Home Integration
Installation Steps
7.1 Pre-Installation Checklist
7.2 Mounting the Thermostat
7.3 Connecting Wires to the Thermostat

System Operation Settings
8.1 Heat/Cool Configuration
8.2 Setting Up the Changeover Valve
Installer System Test
9.1 Testing the HVAC System
9.2 Verifying Thermostat Operation
Advanced Features
10.1 Smart Recovery Mode
10.2 Remote Management via Honeywell Home App
Troubleshooting
11.1 Common Installation Issues
11.2 Resetting the Thermostat
Maintenance and Care
12.1 Cleaning the Thermostat
12.2 Replacing Batteries
Energy Efficiency Tips
13.1 Optimizing Temperature Settings
13.2 Using Programmable Schedules
Smart Home Integration
14.1 Connecting to Smart Home Systems
14.2 Voice Control via Smart Speakers
15.1 Final Checks and Verification
15.2 Ensuring Proper Functionality